
Whether you’re here to grow your following or improve your photography skills, learning how to take great Instagram photos weirdly can take some time to master. I’m still learning what works well with my audience and what doesn’t, and I’m by no means an expert.
But over the years of actually trying to improve my photography as a means to promote this blog, I’ve slowly come to learn how to take great Instagram photos and to collect an arsenal of my favorite best Instagram tips.
These days Instagram is so much more than just a social media platform. It’s a place for creatives, artists, photographers, content creators and everyday folk to share their work, travels, inspiration, tips and more. And knowing the best ways to utilize this incredible platform can help you achieve so many things.
So if you’re looking for a guide on how to improve your Insta photography or are curious what goes into my photos on life of brit, I’m here to share all of my favorite Instagram tips with you! Instagram photography is photography, so even if you’re not interested in growing a social media following, you may find my Instagram photography tips helpful!
For even more killer tips photography tips, check out this roundup by other female travel bloggers!
This post may contain affiliate links, meaning at no additional cost to you, if you click my links and make a purchase, I may earn a small commission. Learn more on my disclosure page. Thank you for your support!
How to Take Great Instagram Photos – My Best Instagram Tips.
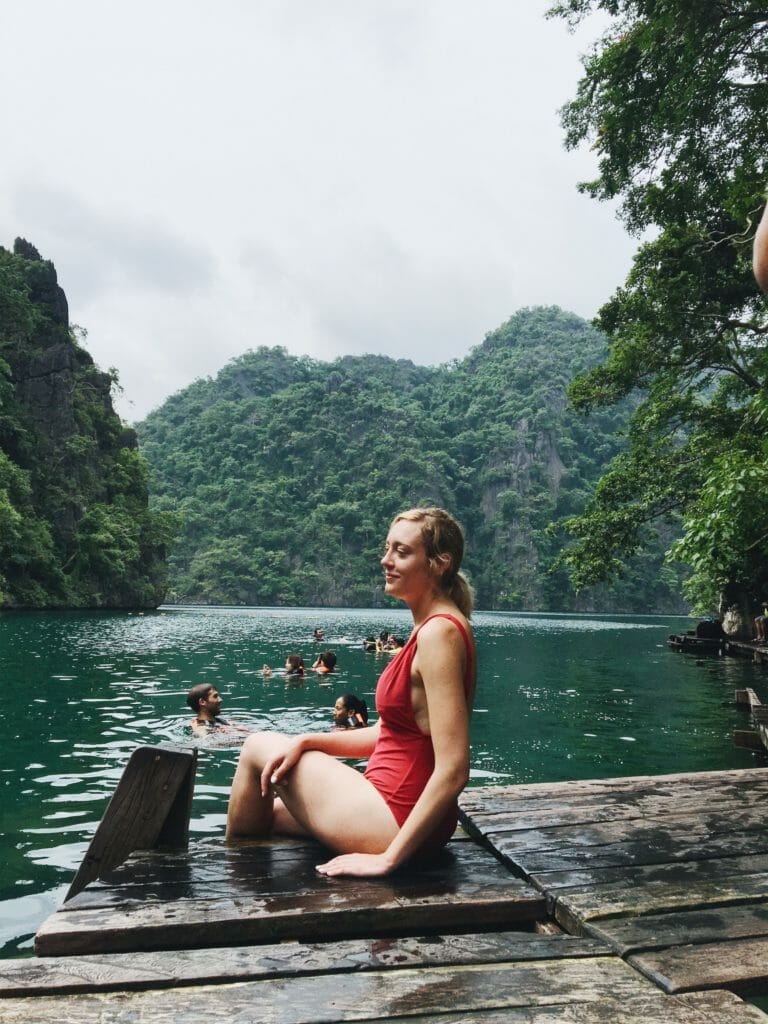
Add a pop of color.
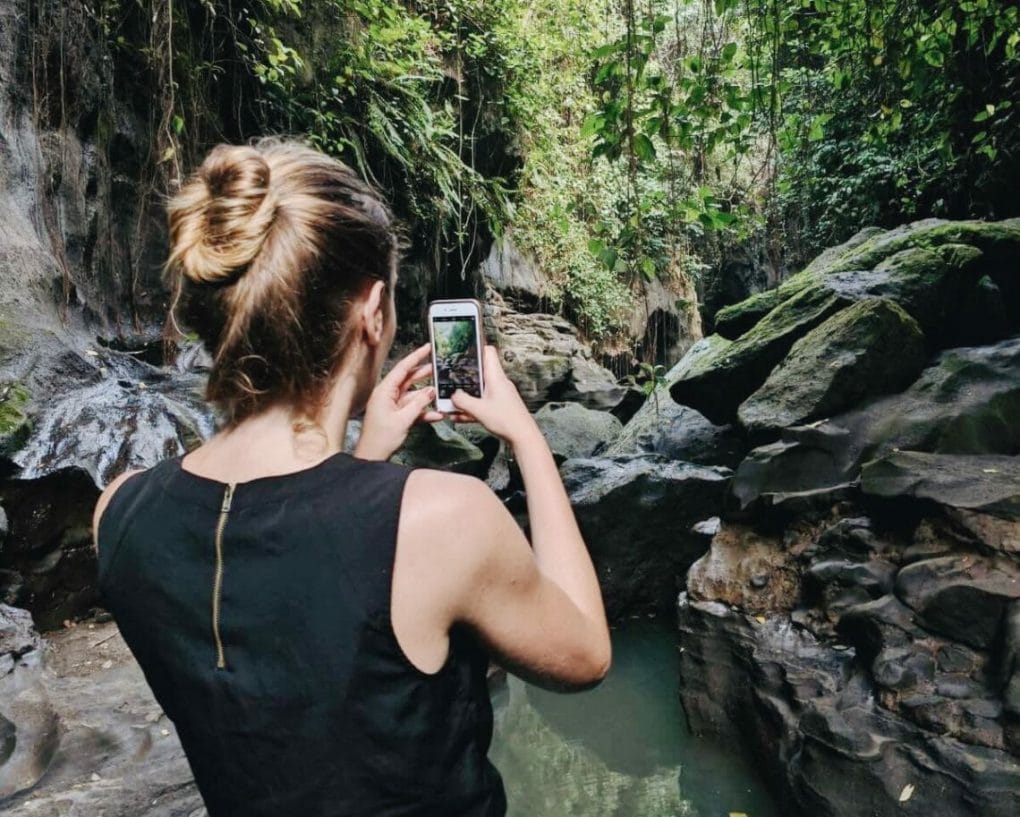
Sometimes all it takes to make your photos a little more interesting is to add a pop of contrasting color that sticks out from the background. Maybe a bright backpack, article of clothing, part of the background that is unique from the rest of the surroundings. It can really make a big difference in how visually appealing your image is. This is one of my favorite best Instagram tips.
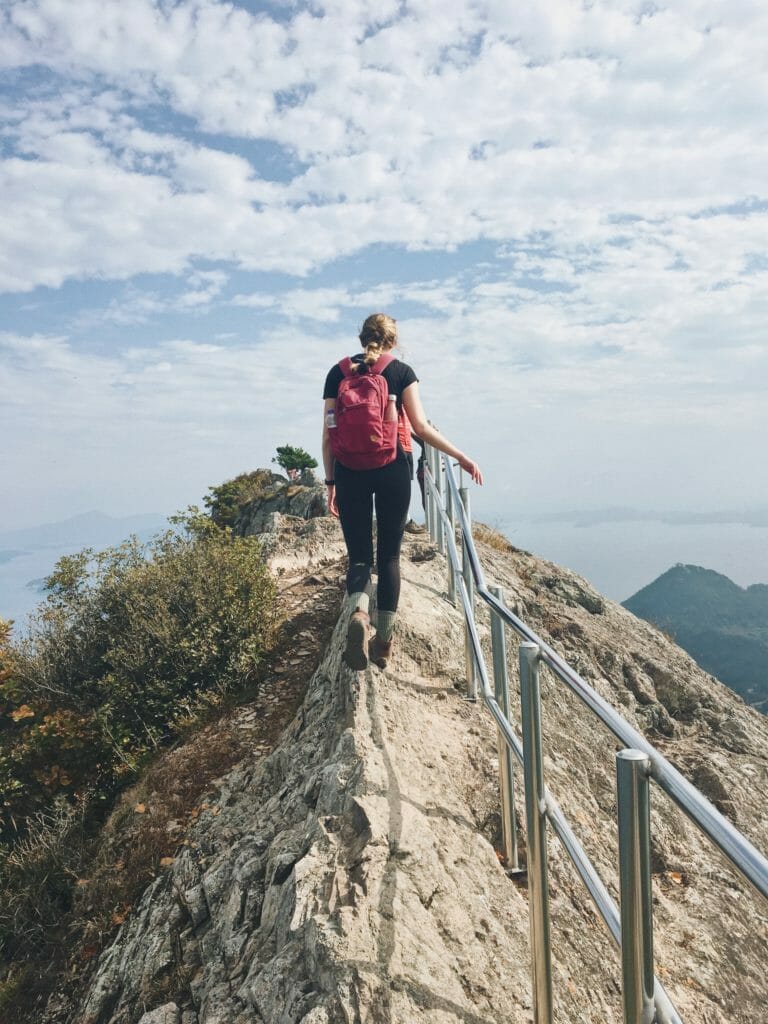
Add your personal unique perspective.
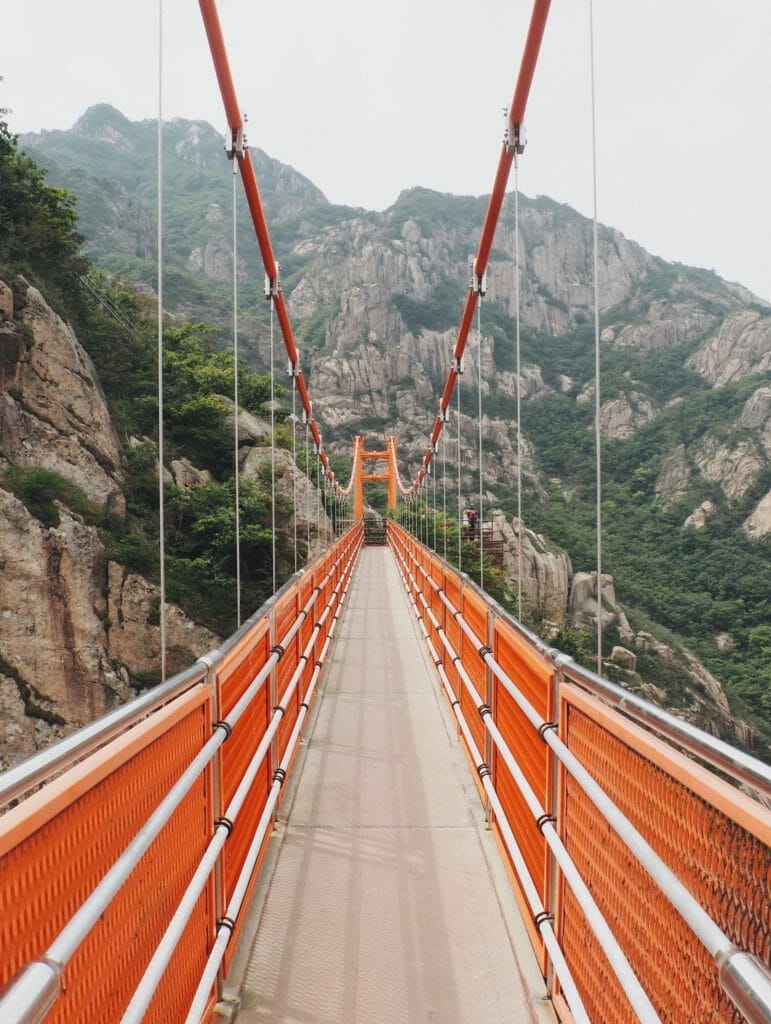
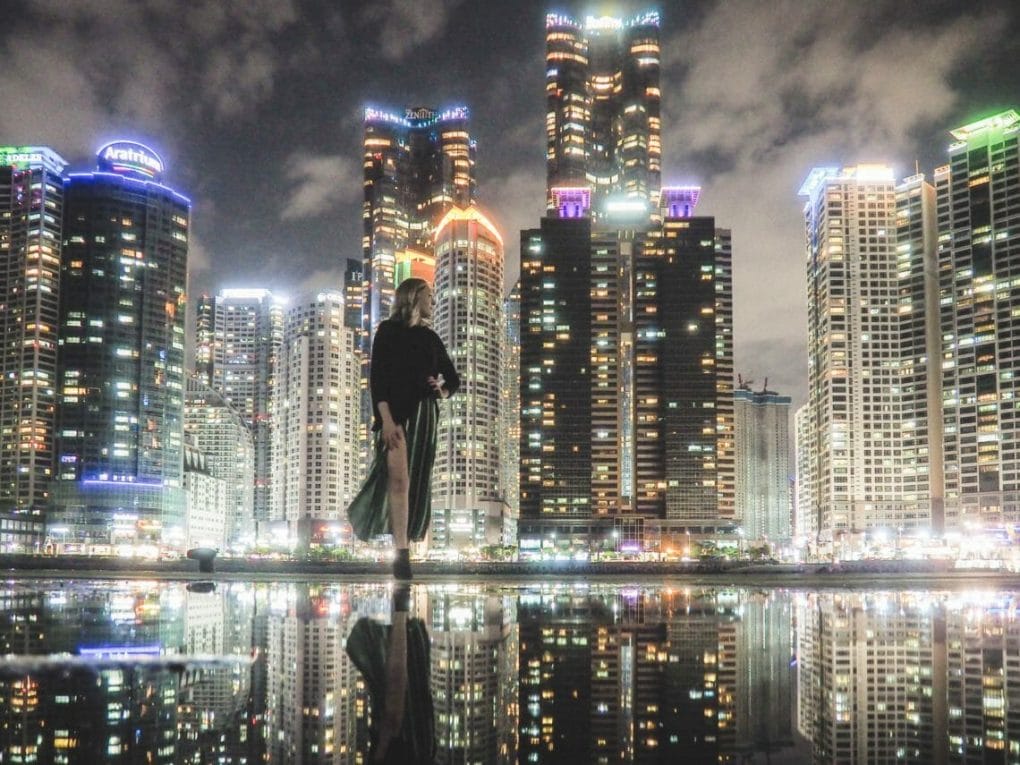
Photos that showcase just how big, or beautiful or epic a landscape, building or subject matter is, catches people’s attention. You can experiment with adding perspective in a few different ways. Try shooting from lower or higher angles, through an object, by using reflections, try different ways of framing your subject etc. There are a million different ways to capture a subject through photography!
Instagram has a way of making tourist attractions or landscapes cliche. When a famous/influential photographer or Instagrammer visits a beautiful place and snaps a popular photo – thousands of that same exact photo pop up on the gram from fellow travelers.
Changing up the angle or perspective a bit can make your photo stand out from the crowd and attract people to your work. These iconic shots are classic and not necessarily bad – they’re beautiful and popular for a reason – but show the people who you are and what your unique spin is on a beloved place.
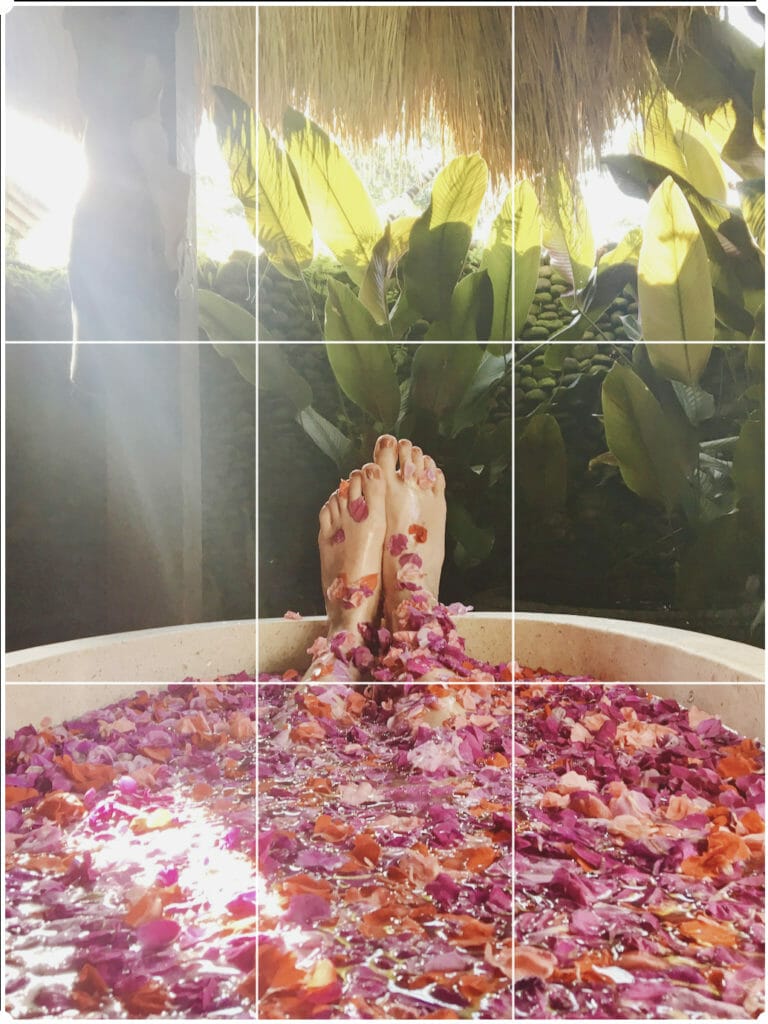
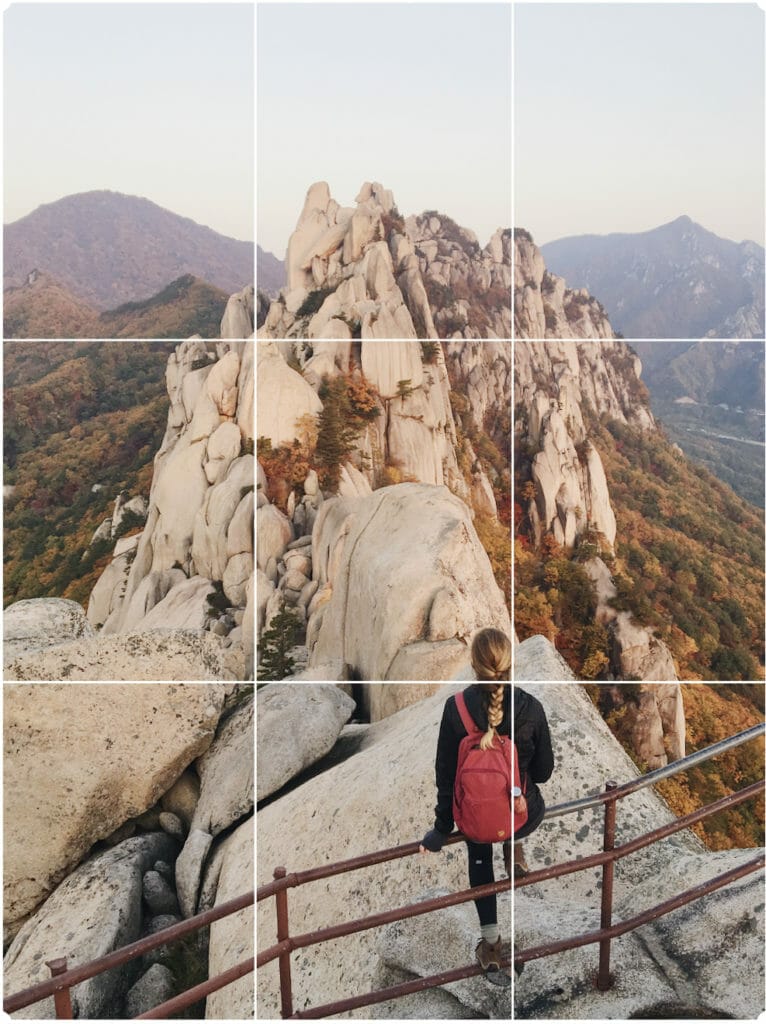
The rule of thirds.
In the same vein as adding perspective, the rule of thirds is a classic photography trick to help you do just that. It’s a guideline in which you should break up the composition of your photo into thirds both vertically and horizontally, giving you a nine-square grid. Playing around with placement of your subject within that grid can help you achieve really visually interesting photos.
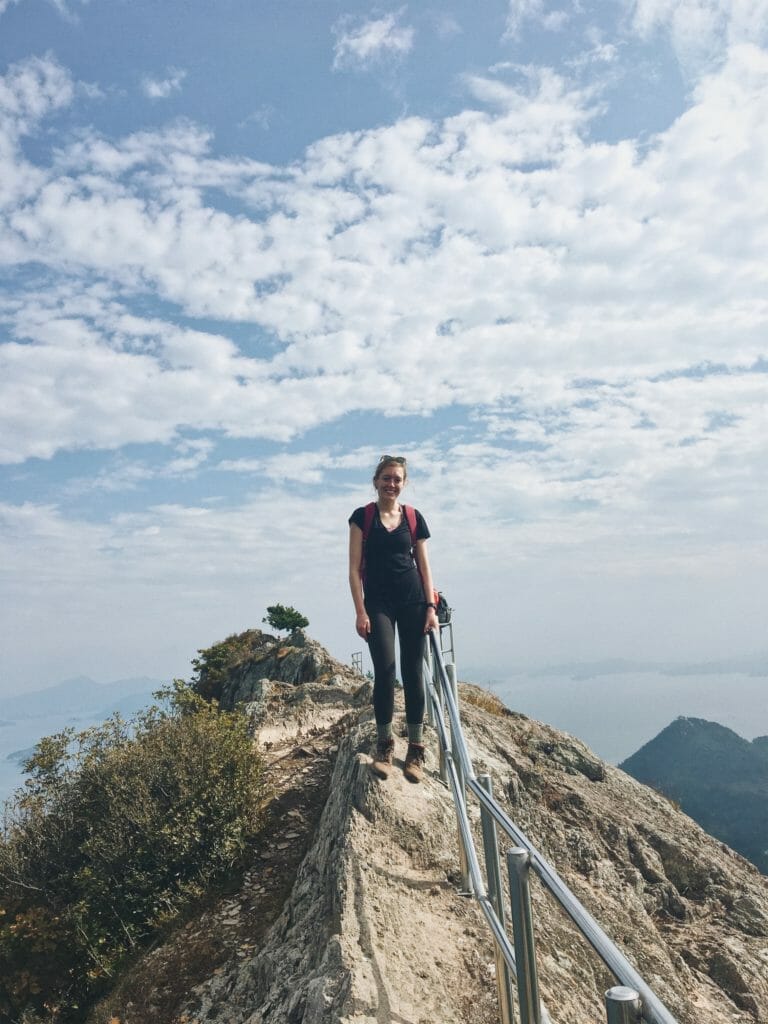
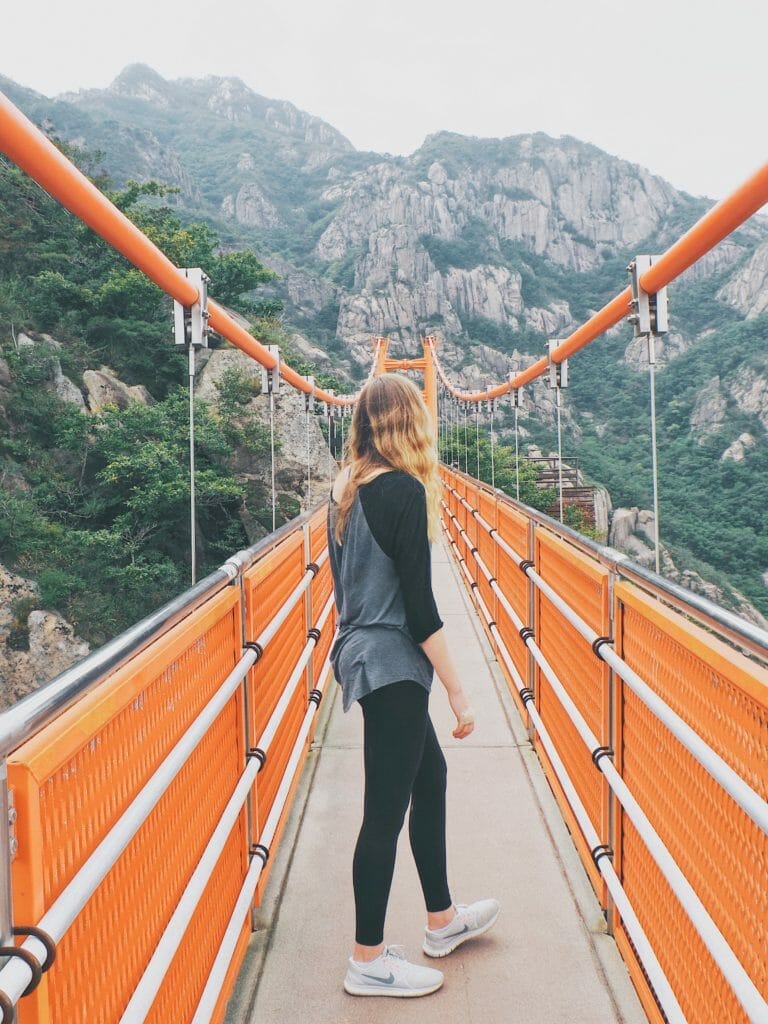
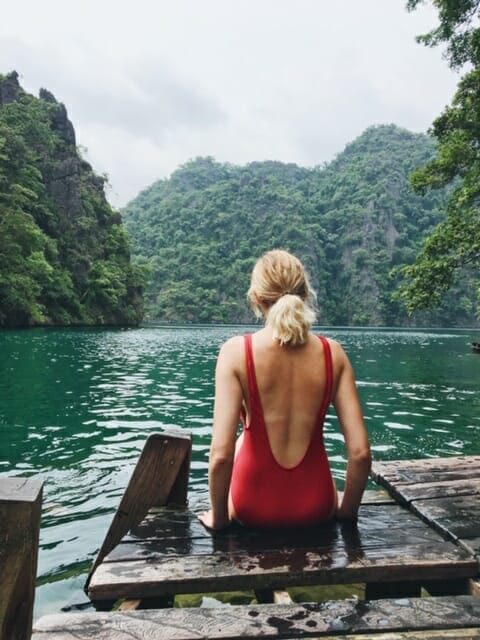
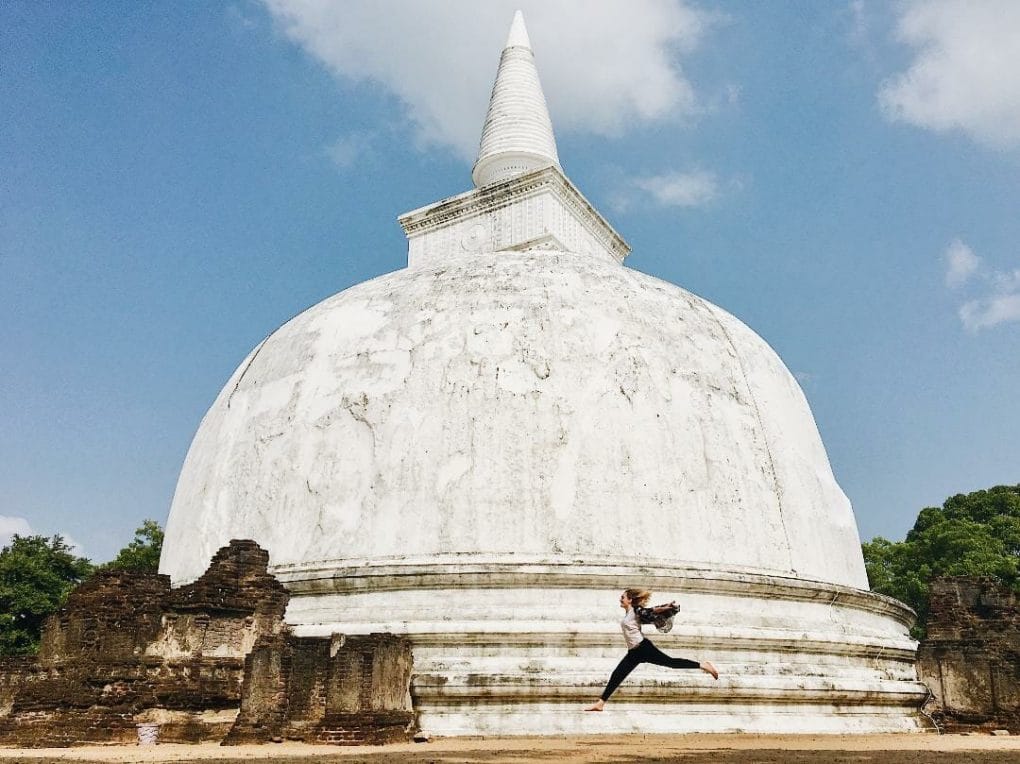
Put yourself or another person in your photos.
Another way to add perspective is by putting a person in your shots. Famous Instagrammers often use themselves as their own model. Photos that have people in them tend to do better because it creates a more authentic experience. It creates the feeling for your audience that they’re there as well or that they could be one day.
Know your best angles.
So you’ve started adding yourself (or others) to your photos, but you have to take it one step further. Play around with different poses and faces to see what works best for you and your photography. This actually is one of the hardest things for me to learn and master!
Find your unique editing style and stay with it.
Instagram is all about a theme and finding a niche. When you check out popular Instagrammers, their photos are all cohesive and have a similar color tone, scheme, and feeling. If you’re trying to create a gallery that has this same cohesion, you’ll want to find an editing style that showcases who you are as a photographer and an artist.
Before: unedited and after: edited with my bright and clean style
Be consistent.
Find your niche or target audience and try to be consistent in what you share. Are you a city photographer? Landscape? Hiker? Foodie? If you can narrow it down even further to a niche like ‘Korean Foodie’ or ‘Korean Hiker’ and give the people consistency, you should see great results. I’m actually so terrible at this. It’s hard to focus on one sub-niche when you love both nature and the cities of the world. Do as I say, not as I do
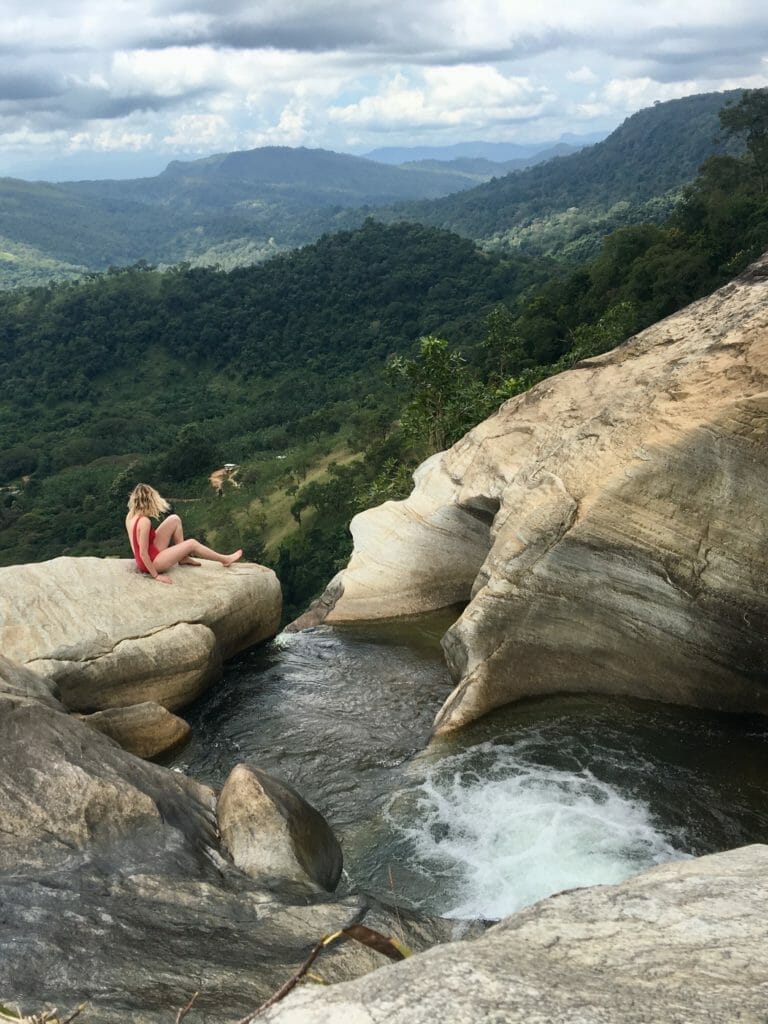
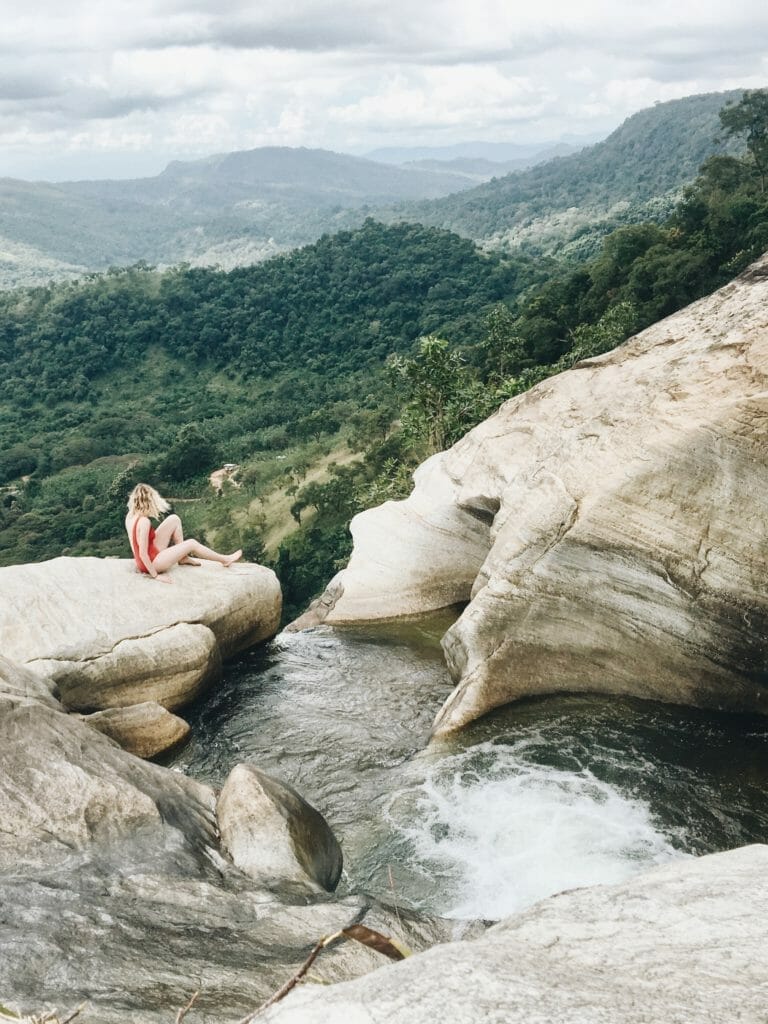
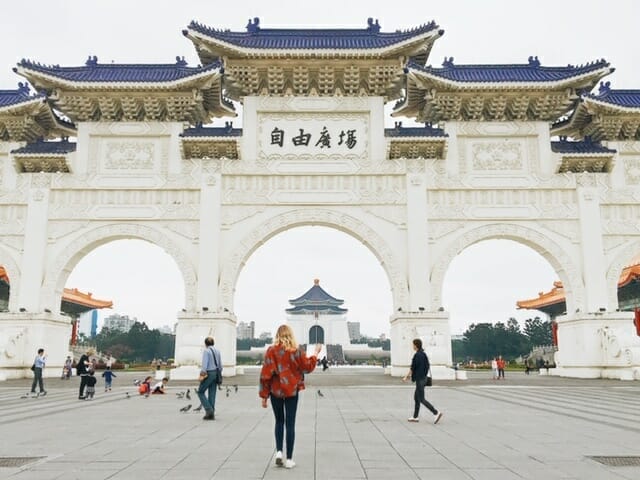
Practice with a tripod and going at it solo.
You know best what you want out of your photos (usually, unless you’re lucky and know an amazing photographer). Embrace going out and shooting with just yourself, your camera and your tripod. Some of my favorite photos have been from solo travels where I experimented without worrying about another person’s opinions.
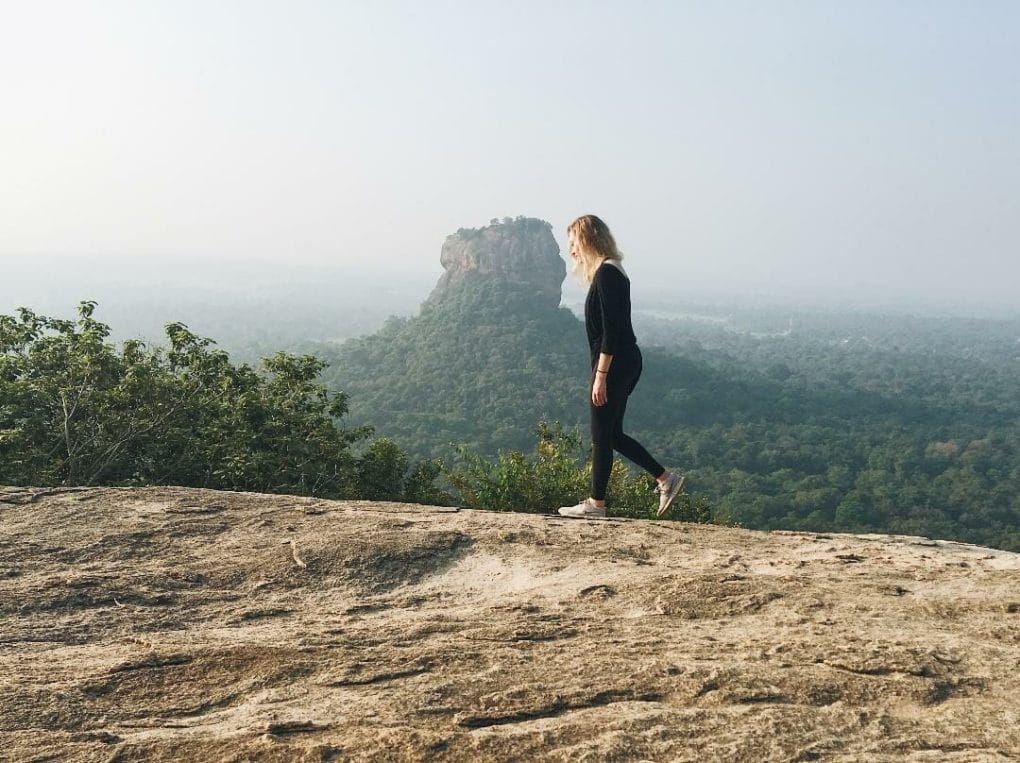
It’s a great way to practice and improve your skills as well as finding out what you like best. Both of the below photos are from solo trips I took to Taiwan and Sri Lanka respectively.
Post at the best time for your followers.
There are times of day that you’ll see better engagement, so try to post when your followers are most active. You can do this by experimenting and keeping track of your reach. If these stats are important to you, you can (and should) upgrade to a business account to see all the numbers broken down. You can also use third party apps like Tailwind.
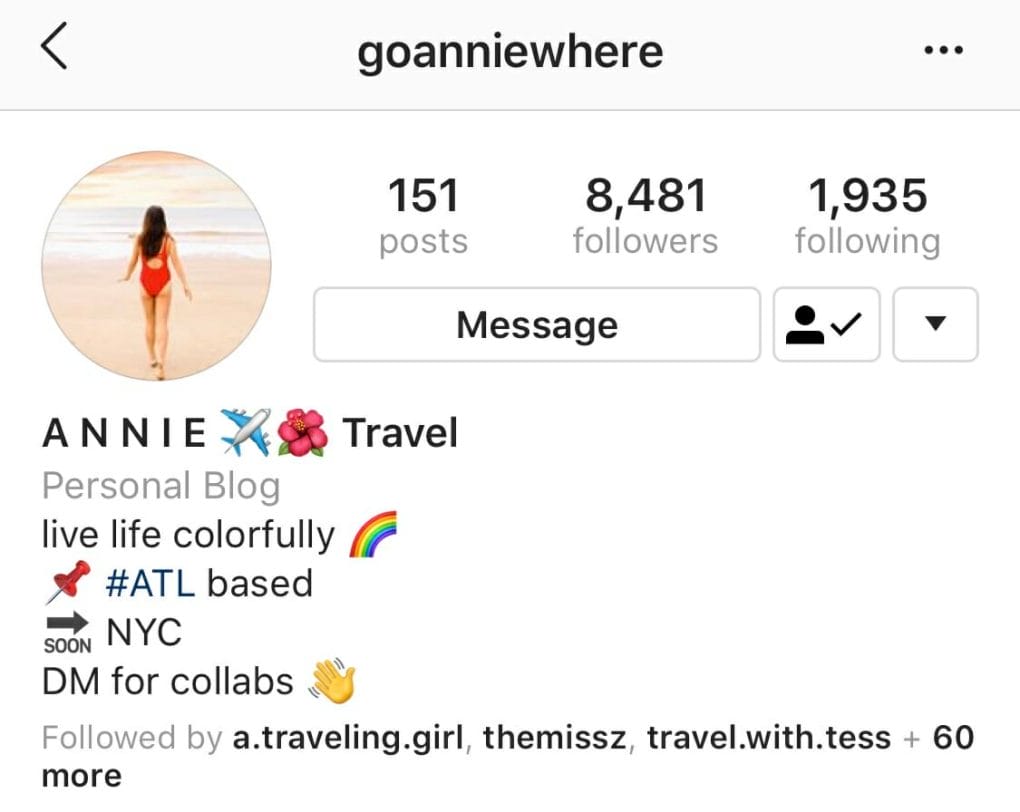
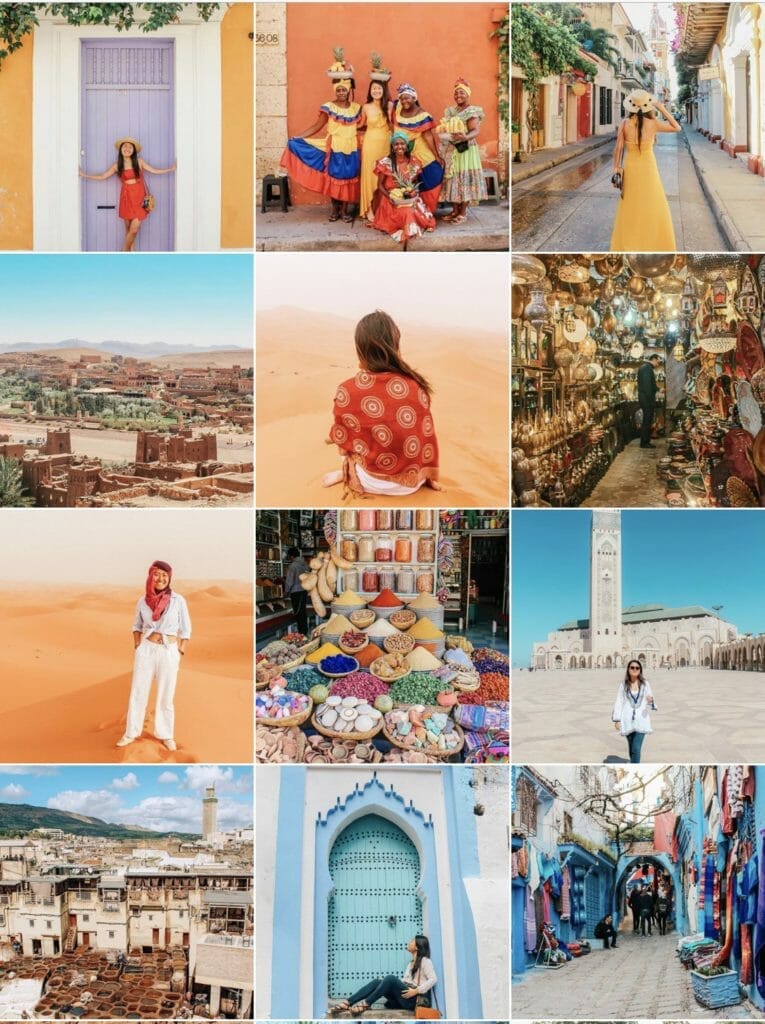
Search other famous Instagrammers for inspo.
Look to others for inspiration to help you grow your own skills. You never want to copy another artist’s style exactly, but it’s insightful to see what others are doing well for your own personal growth. Find your favorite Instagram role models and grow your own artistic vision from their influence.

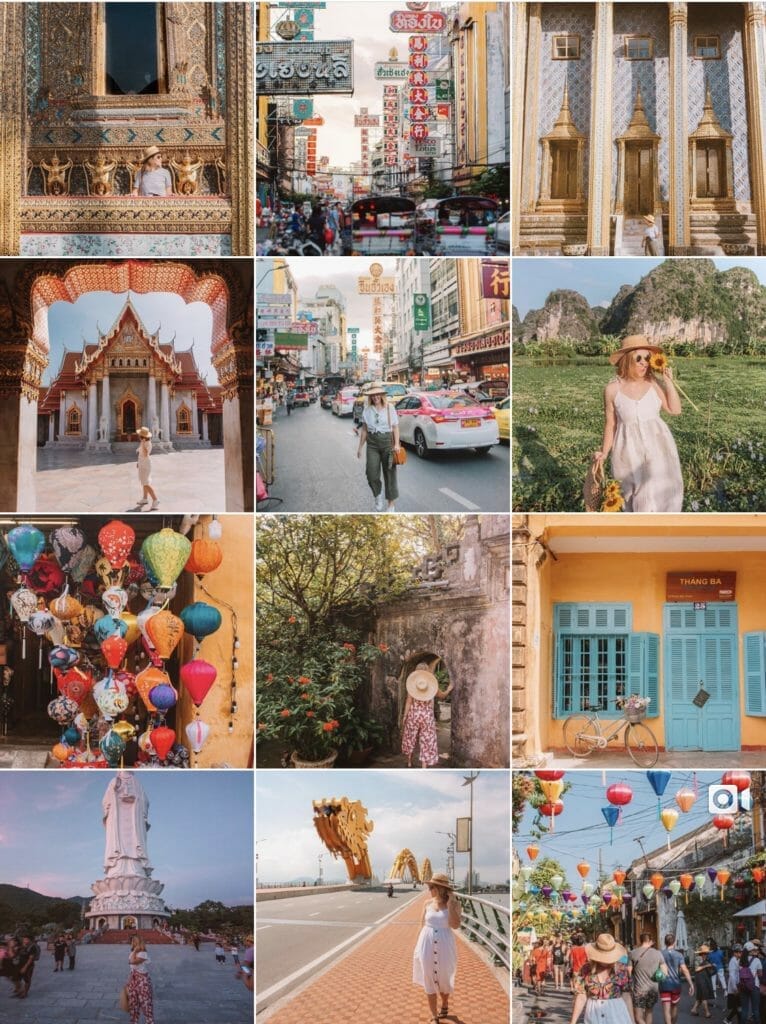
Kelsey takes such stunning photos of Vietnam! Check out her gallery here.
I love Annie’s vibrant and warm hues. See more of her art here.
Pay attention to what your followers like best.
Your followers are your audience and you should listen to what the people like. Use their likes and comments as a guide to what does well with them and what doesn’t. You of course ultimately must post what makes you happy, but if you’re looking to grow, you need people behind you to make it happen!
My Favorite Instagram Tools
Adobe Lightroom
Lightroom is one of the best ways to edit photos as it has an immense number of tools and ways to bring your photos to life. The computer software is a little pricey, $150, so it’s definitely a financial investment you have to want to make. For those serious about learning to better their photography, it’s worth it.
Lightroom also has applications for your smartphone that are pretty great. It obviously doesn’t have all of the same amazing features as the desktop version, but it does the trick! You can also create your own presets (filters) and upload them to your mobile app for quick editing while on the road.
The editing tools you have at your disposable can really make a difference to your photography. It’s probably one of the best answers to your how to take great Instagram photos inquiries.
Lightroom lets you accomplish so much more with your photos
VSCO
When I want to post a photo before I have access to my computer to edit it in Lightroom, VSCO is my go-to editing application. It has so many different features and filters and I love the style it allows me to achieve with my tones and edits. I highly recommend!
Huji Cam
This app is super hot right now and turns your photos into vintage inspired, film captures. While I don’t recommend using it for your photos or posts, it can make a fun and engaging way to share your adventures on your stories with minimal editing effort.
You can download it from the Apple Store and the Google Play Store.
Tailwind
Tailwind is an app that allows you to track your followers, engagement and when the best time to post your photo is for optimal reach. You can use a few of these features for free but if you want a deeper analysis into your Insta stats, you have to pay for their services. I get by with their free version though!
Tripod
A tripod is also great for traveling and gives you so much more freedom with your photography. It lets you capture low-light photos that require zero motion, or group photos without having to ask a stranger, or even just yourself for when you’re traveling solo.
I recommend: Manfrotto Universal Phone Tripod + JOBY GorillaPod SLR Tripod
I have the Manfrotto Universal Phone Tripod and love it for my iPhone. The JOBY GorillaPod is also fantastic as it allows you to place your digital camera in hard-to-reach places with the tight wrap technology of the arms. The description states SLR but it also fits my Olympus Mirrorless Camera.
Bluetooth Remote
The ten second timer on our devices is just not enough time to set up your shot before the photo is taken. With Bluetooth remote, you’re no longer restricted to that short countdown.
I recommend: HISY Bluetooth Remote
I love the HISY Bluetooth Remote. It’s a super small and lightweight button that’s easy to carry and lets you take your photo whenever you’re ready.
It works with both iPhone and Android devices and it just connects through Bluetooth.
The HiSY Remote lets you nail fun jumping shots!
Mirrorless Camera
I’m an active traveler and a causal photography enthusiast so I wanted a light-weight camera that would produce great photos without the insane price tag and bulk of super high-end cameras. So I traded in my DSLR for the Olympus Mark ED-ii mirrorless camera and I’m very happy with the results. It was a great compromise without giving up too much on the quality of the photos.
While it isn’t necessary to have a high end camera to capture stunning photos, they can make a pretty big difference. So if you’ve been wondering how to take great Instagram photos like the big time influencers on the gram, choosing the best camera whether it’s a DSLR or mirrorless can make a big difference.
I recommend: Olympus OM-D E-M10 Mark II
I love the photos this lightweight camera takes! It’s just what I need to maintain this wonderful blog and capture the memories that will last me a lifetime.
Wide Angle Lens Converter
The bulk of what I capture on vacation is landscapes, so a wide angle lens converter for my Olympus helps me do just that!
I recommend: Olympus Wide Angel Converter
I love this specific one and highly recommend to anyone else looking for a wide angle lens! It fits the Olympus 14-42 mm standard lens.
Smartphone Clip-on Lens
Another great accessory for those smartphone photographers out there, is a clip on lens that allows you to add a wide angle, fish eye or whatever type of manipulation you’d like. It’s light and easy to carry around too.
I recommend: Olloclip
I’ve taken some of my favorite iPhone photos with this Olloclip! I love the wide-angle lens and how much more of the landscape it allows you to capture. Ollo also sells clip on lenses for Samsung and non-iPhone phones.
This post may contain affiliate links, meaning at no additional cost to you, if you click my links and make a purchase, I may earn a small commission. Learn more on my disclosure page. Thank you for your support!
I hope my favorite best Instagram tips help you with your photography! Share your favorite Instagram tips and tools below.
If you haven’t already, check out Snapseed for photo editing on the go. I use it with Lightroom and love the flexibility between both
I actually have never used Snapseed! I’ll def check it out! Thanks for the tip 🙂
These tips are great and a great post {as always}! I feel your pain about consistency…it’s hard when you go from city to sweeping landscapes, etc. Do you use UNUM? It’s really helped me plan what my grid will look like before I post something, and helps me with transitions and all that jazz.
Ooh no I don’t!! Thanks for the tip – I’ll definitely check it out. That’s definitely my biggest struggle. Hoping once I get out an am more actively traveling again I’ll be able to get it under control again! Thanks Tara 🙂